
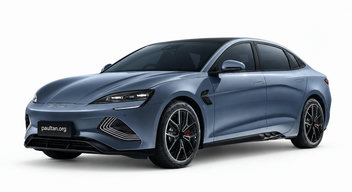
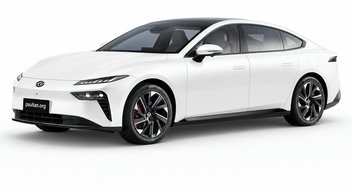
Verdict
These two rear-wheel-drive sedans are much closer than their specifications first suggest: the Dongfeng is 0.1 seconds quicker to 100 km/h, yet the BYD brings 308 hp and 360 Nm against 268 hp and 310 Nm. For long inter-city runs, the 007’s 650 km range, 200 kW DC charging and 452-litre boot carry real weight. The Seal counters with 9 airbags, double-wishbone front suspension and a 2,920 mm wheelbase. Its 82.56 kWh battery is larger, but its claimed range is 570 km.
Pick the BYD Seal if you want 9 airbags, 308 hp and 360 Nm, plus a 7 kW AC charger and more complete driver and cabin equipment.
Pick the Dongfeng 007 if a 650 km claimed range, 200 kW DC charging, 452-litre boot and seven-year unlimited-mileage vehicle warranty matter most.
Key differences
- Price: BYD Seal RM171,800; Dongfeng 007 RM169,888.
- Claimed EV range: BYD Seal 570 km; Dongfeng 007 650 km.
- DC charging: BYD Seal 150 kW; Dongfeng 007 200 kW.
- Motor output: BYD Seal 308 hp and 360 Nm; Dongfeng 007 268 hp and 310 Nm.
- Safety: BYD Seal has 9 airbags; Dongfeng 007 has 6 airbags.
- Boot space: BYD Seal 400 litres; Dongfeng 007 452 litres.
Seal
- 308 hp and 360 Nm from its rear motor.
- 9 airbags and front passenger ISOFIX.
- Double-wishbone front suspension, 7 kW AC charging and 150 kW DC charging.
- 570 km claimed range trails the 007’s 650 km.
- 150 kW DC charging is 50 kW below the 007.
- 400-litre boot is 52 litres smaller.
007
- 650 km claimed range and 200 kW DC charging.
- 452-litre boot and 1,852 kg kerb weight.
- Seven-year unlimited-mileage vehicle warranty and eight-year unlimited-mileage battery warranty.
- 268 hp and 310 Nm trail the Seal’s 308 hp and 360 Nm.
- Six airbags versus the Seal’s nine.
- Single-zone climate control, no head-up display and no front parking sensors.
What the Seal has over the 007
Based on the published spec sheets of the selected variants — a blank field on one side can also mean unlisted data.
Boot space favours the 007: 452 litres against 400.
Representative body-type outlines, drawn to scale from each car's length and height.
| Price & overview | ||
|---|---|---|
| Price | RM171,800 | RM169,888✓ |
| Body type | Sedan | Sedan |
| Segment | Compact Executive | Compact Executive |
| Assembly | CBU | CBU |
| Ownership | ||
| Road tax / year | RM335 | RM260✓ |
| Monthly instalment (est.) | RM1,755/mo | RM1,735/mo✓ |
| Insurance / year (est.) | RM4,715 | RM4,665✓ |
| Electricity / year (est.) | RM1,287 | RM1,005✓ |
| Energy cost / 100 km (est.) | RM6.44 | RM5.02✓ |
| 5-year running costs (est.) | RM31,683 | RM29,647✓ |
| Charging (estimated) | ||
| AC charge 0–100% (est.) | 11.8 hours | 11.1 hours✓ |
| DC charge 10–80% (est.) | 40 min | 25 min✓ |
| Powertrain | ||
| Engine Tech | 800V architecture | 400V architecture |
| Fuel | Electric | Electric |
| Number of Motors | 1 | 1 |
| Motor Horsepower | 308 hp✓ | 268 hp |
| Motor Torque | 360 Nm✓ | 310 Nm |
| Battery Capacity | 82.56 kWh✓ | 73.48 kWh |
| EV Range | 570 km | 650 km✓ |
| Charging Rate (AC) | 7 kW✓ | 6.6 kW |
| Charging Rate (DC) | 150 kW | 200 kW✓ |
| V2L | 3.3 kW | 3.3 kW |
| Drivetrain | ||
| Transmission | Single Ratio Automatic | Single Ratio Automatic |
| Driveline | Rear Wheel Drive | Rear Wheel Drive |
| Performance & Efficiency | ||
| 0-100 km/h | 5.9 seconds | 5.8 seconds✓ |
| Top Speed | 180 km/h | — |
| Dimensions | ||
| Length | 4,800 mm | 4,880 mm |
| Width | 1,875 mm | 1,895 mm |
| Height | 1,460 mm | 1,465 mm |
| Wheelbase | 2,920 mm | 2,915 mm |
| Weight | 2,055 kg | 1,852 kg |
| Doors | 4 | 4 |
| Seats | 5 | 5 |
| Boot Space | 400 litres | 452 litres✓ |
| Front Tyre | 235/45R19 | 235/45TR19 |
| Rear Tyre | 235/45R19 | 235/45TR19 |
| Spare Tyre | N/A, Tyre Repair Kit | Tyre Repair Kit |
| Factory Tyres | Continental EcoContact 6 Q | — |
| Chassis | ||
| Assembly | China (CBU) | China (CBU) |
| Front Suspension | Double Wishbones | MacPherson Struts |
| Rear Suspension | Multi-link | Multi-link |
| Front Wheels | 19" Alloys | 19" Alloys |
| Rear Wheels | 19" Alloys | 19" Alloys |
| Steering | Rack and Pinion (Electric Power Steering) | Rack and Pinion (Electric Power Steering) |
| Chassis Notes | Frequency Selective Damping | — |
| Safety | ||
| Airbags | 9 (Driver and Front Passenger, Front Side, Front and Rear Curtain, Driver's Knee Airbag) | 6 (Driver and Front Passenger, Front Side, Curtain Airbags) |
| ABS/EBD | ✓ | ✓ |
| Stability Control | ✓ | ✓ |
| Alarm | ✓ | — |
| Immobilizer | ✓ | ✓ |
| Child Safety Lock | Manual for Rear Doors | Manual + Screen Control For Rear Doors |
| Seat Belts | 5 Three-point | 5 Three-point |
| Blind Spot Info System | ✓ | ✓ |
| ISOFIX | Available on Front Passenger and Outer Two Rear Seat | Available On Outer Two Rear Seats |
| Autonomous Braking System | Yes | Yes |
| Lane-keeping Assist | Steering Correction | Steering Correction |
| Collision Warning | ✓ | ✓ |
| Seatbelt Reminder | All Seats | All Seats |
| Lighting | ||
| Headlamps | LED Projector with Auto High Beam | LED Projectors |
| Taillamps | Full LED | LED Combination |
| LED Daytime Running Lights | ✓ | ✓ |
| Rear Foglamps | ✓ | ✓ |
| Wing Mirror Turn Indicators | ✓ | ✓ |
| Cabin | ||
| Front Seats | Power-adjustable Front Seats, Ventilated with Driver's Side Memory Function | Powered Front Seats with Ventilation Function |
| Rear Seats | 60:40 Split-folding | One-piece Folding |
| Front Air-con | Dual-zone Automatic Climate Control | Single-zone Automatic Climate Control |
| Rear Air-con | Rear AC Vents | Rear AC Vents |
| Sunroof | Panoramic Glass Roof | Panoramic Glass Roof |
| Power Sockets | 1 Front, 2 Front USB, 2 Rear USB, 2 Wireless Chargers | 1 Front, 1 Wireless Charger, 1 USB Front, 2 USB Rear |
| Interior Lighting | Map Lights and Ambient Lights | Map Lights and Ambient Lighting |
| Cup Holders | 2 Front, 2 Rear | 2 Front, 2 Rear |
| Sun Shade | Panoramic Glass Roof Shade | — |
| Audio | 15.6" Rotating Touchscreen with Apple CarPlay & Android Auto, 12-speaker Dynaudio HiFi Audio System | 15.6" Touchscreen with Wireless Apple CarPlay & Android Auto, Wanos Sound System with 19-speakers |
| Convenience | ||
| Power Windows | Four Windows, Auto Up and Down with Anti-Pinch | Four Windows, Auto Up & Down |
| Engine Start | Keyless Push Button | Keyless Start (Depress Brake Pedal) |
| Locks | Keyless Operation | Keyless Operation |
| Auto Headlamps | ✓ | ✓ |
| Auto Wipers | ✓ | ✓ |
| Cruise Control | Adaptive Cruise Control with Stop and Go | Adaptive Cruise Control |
| Steering Audio Control | ✓ | ✓ |
| Steering Tilt | ✓ | ✓ |
| Steering Telescopic | ✓ | — |
| Boot Operation | Powered Boot | Powered Boot |
| Parking Sensor Front | 2 Sensors | — |
| Parking Sensor Rear | 4 Sensors | 4 Sensors |
| Reverse Camera | Yes, with 360-degree Camera | Yes, 360-degree Surround View |
| Folding Wing Mirrors | ✓ | ✓ |
| Bluetooth | ✓ | ✓ |
| Navigation | ✓ | — |
| Head-up Display | ✓ | — |
| Hill Start Assist | ✓ | ✓ |
| Instrument Cluster | Full LCD Monitor | Full LCD Monitor |
| Parking Brake | Electronic | Electronic |
| Warranty | ||
| Warranty Mileage Manufacturer | 150,000 km | Unlimited✓ |
| Warranty Manufacturer | 6 years | 7 years✓ |
| Warranty Notes | 8-year/160,000-km Battery Warranty, 8-year/150,000-km Electric Drive Unit Warranty | 8-year, Unlimited Mileage Warranty for Drive Battery |
Specs shown for the selected variant of each car. ✓ marks the better figure where lower/higher is objectively better. Road tax: West Malaysia, private registration. Running-cost estimates assume 20,000 km/year. Electricity at RM0.44/kWh (TNB domestic, home charging); public DC charging costs around RM1.30/kWh. Charging times estimated from battery capacity and peak charging rates. Insurance: comprehensive motor tariff, no NCD. Instalment: 10% down, 2.5% flat rate, 9 years. Prices checked October 2026.
Used Seal & 007 for sale
Our reviews & guides
BYD Seal


Seal vs 007 FAQ
Is the BYD Seal or Dongfeng 007 better?
The Dongfeng 007 is the stronger long-distance choice with 650 km range, 200 kW DC charging and a 452-litre boot. Choose the BYD Seal for its 9 airbags, stronger 308 hp motor and more extensive cabin and driver equipment.
What is the price difference?
The BYD Seal costs RM171,800 and the Dongfeng 007 costs RM169,888, so the Seal is RM1,912 more expensive.
Which one charges faster?
The Dongfeng 007 charges faster on DC power at up to 200 kW, versus 150 kW for the BYD Seal. The Seal is marginally quicker on AC charging, rated at 7 kW against 6.6 kW.
How long does charging take?
The Seal's 82.6 kWh battery takes about 11.8 hours for a full AC charge, and an estimated 40 minutes from 10% to 80% on a DC fast charger at its 150 kW peak. The 007's 73.5 kWh battery takes about 11.1 hours for a full AC charge, and an estimated 25 minutes from 10% to 80% on a DC fast charger at its 200 kW peak.
Which has the better warranty?
The 007 carries a 7-year manufacturer warranty against 6 years for the Seal. Seal: 8-year/160,000-km Battery Warranty, 8-year/150,000-km Electric Drive Unit Warranty. 007: 8-year, Unlimited Mileage Warranty for Drive Battery.